DIE CUTS READY FOR CRAFTING
Hello everyone. I hadn't forgotten you....honest. I have been busy these past few days. On Friday I spent the day with my daughter-in-laws sister, who is here in Scotland looking after my grandchildren while their parents have a well deserved break abroad. It was really great spending all that time together, as we didn't really know each other very well at all, and had never spent any amount of time in each other's company except when we attended my son's wedding to her sister. So, it was lovely. We talked all day, had lunch out, and she visited my home and met Jazz and Bess (thankfully she loves dogs!)
The rest of the time, when I have not been visiting social networks, emailing people and on the phone to others, I have spent die cutting.....so that's what today is all about. Using up bits and bobs of paper and card that one would normally throw out. It's just a matter of placing them in the right position and using dies that fit them.
Here is my first offering:
These are grand borders from Spellbinders. It's the first time I had used them and I coloured them whilst still in the stencil. Now, if I use them I will probably touch them up to a better standard, but this was just an exercise to see how they would turn out. They are 12" long and 2 and 1/4" deep. There will be many things I can do with these dies and I am looking forward to using them soon. The white card I used were strips left over from another project.

The video is for people using the cuttlebug, but you will then realise the grand calibur will cut them out in a one as they have 12" cutting plates.
Here I have a selection of round things!!! Okay then, I have no idea what else to call them. The top one is cut out of grey self adhesive felt and you will see there is also a gold one with my reflection showing in it! The edging is of butterflies. The pink one in the centre is the same as the one on the right between the grey and gold larger circles, except I left in the twirly bits..........you are now probably getting a flavour of what it would be like to have me demonstrate things to you............twirly bits, round things etc etc ........I'm very technical you know!!!! NOT!!!! The pink butterfly fits onto the other two butterflies, so gives a 3D effect, and can be done in any colour combination, as can everything else I am showing you. I had bits of card/paper left (because I never throw anything away!) and used them all up.


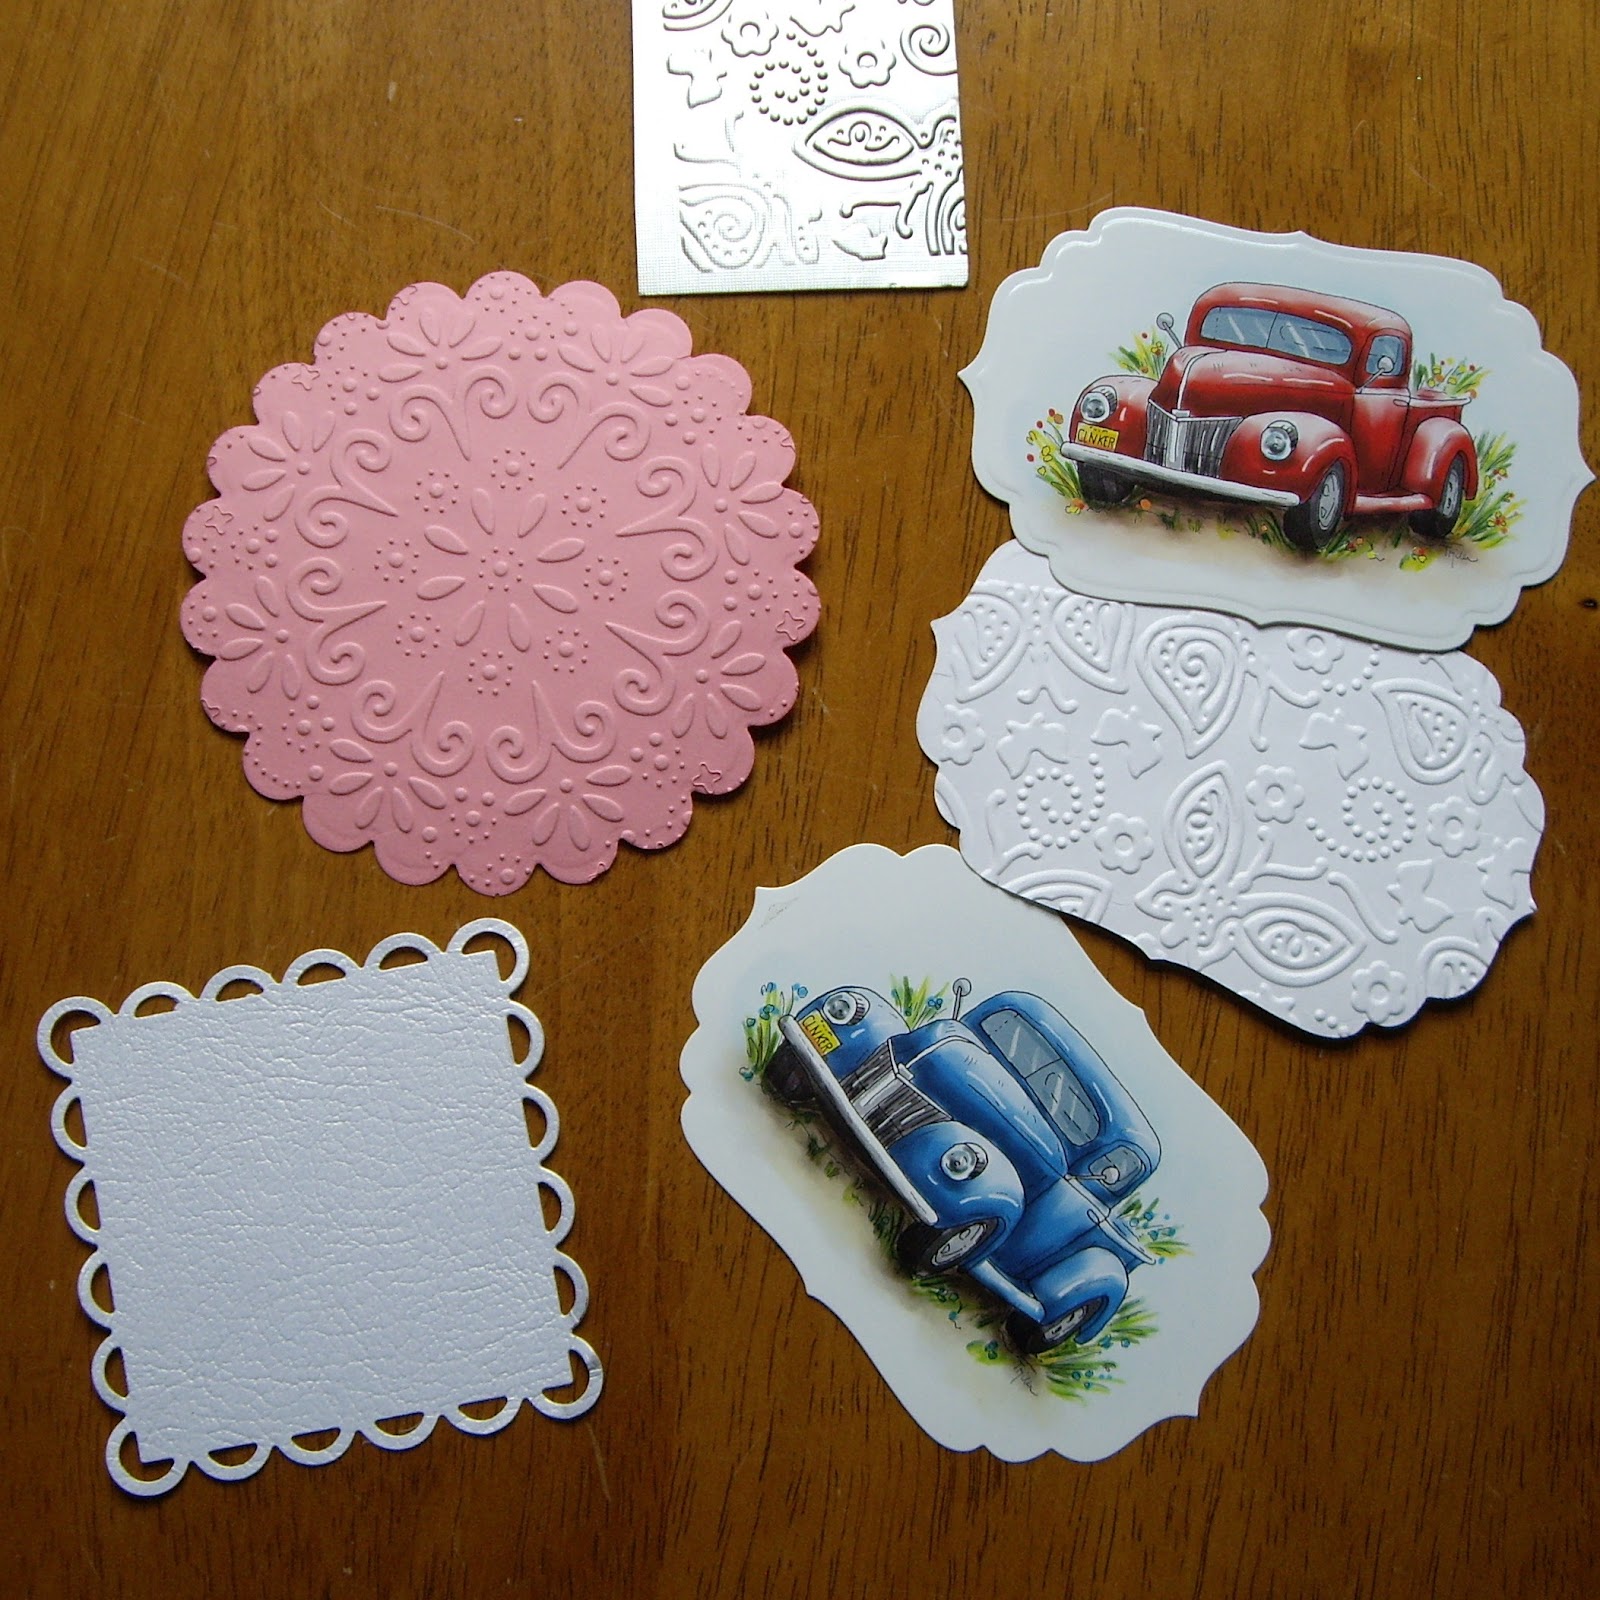
Here I have a mixture of embossed die cuts and digital stamp images I die cut.
The pink scalloped die cut was embossed using the centre of a cuttlebug embossing plus thingy called Blooming Bouquet........and I think it just adds something to the cirlce. The images of the truck and wheelbarrow are Fred She Said digistamps, which I printed and then die cut out. The rest speaks for themselves really. The one next to the wheelbarrow is a marianne die, which I embossed using a cuttlebug paisley embossing folder.

Now I am going to show you some embossing.
The first one is Fleur De Lis, which was made using Spellbinders Impressabilities, which are very delicate metal ........I know, I'll take a photo and show you!!


Again, here is a demonstration using the cuttlebug.
I used rainbow mirricard for this one and you can see how well the embossing has come out.

I also debossed it, which you can see below......I just love the versatility of these stencils.

This one is of cherries which I used on a very pale pink card. These stencils are about 6 x 4" and you can use them whole, or cut them up for individual bits or sections. They really are very delicate, but don't let that put you off. I have used them in my Grand Calibur and Cuttlebug...no problem.

These two are from stencils called Multimal, and were sent to me by my crafty friend from Tiverton. All I did was cut round them and now I have some lovely panels. The two of them fitted onto one A6 piece of card. They can be embossed using a light box or cuttlebug or grand calibur.

These next ones just show how they can be left plain or embossed and the gate/window one is just fabby. I will show you the other side of it. Unfortunately the photo is a bit blurred, but I think you will get the drift!

As you can see I used double sided card, which was made by co-ordinations and I sanded the front so that the brown looks almost gold, but left the back orange.

Now, here I had some fun with hearts. I love these and they are just perfect for wedding cards, valentines or just for love. As you can see I have used the base heart and the intricate companion to it.

Here is a close up of a heart: Isn't it beautiful? These dies are from Memory Box and they have loads more that I would love...............

Finally here are some smaller things I die cut or cut out. First of all the large red flower is a Fred She Said digi-stamp, which I hand cut out and put together ready to use. I think it's lovely. The leaves are spellbinders which I cut out and then embossed. Using spellbinders to cut is easy, and embossing them is too. All you have to do is leave the item you have cut out in it's die and depending on which machine you are using, follow their instructions for embossing.
The 2 top yellow rose flowers were made using a marianne die to cut out the strips and then I rolled them up and glued them once I had let them unwind a little bit. I used a quilling tool to roll the flowers, but really you could use a fine tweezer and do the same. The other four flowers are made by being cut using Xcut quilling dies and then rolling them up too. Once rolled you spread open the petals. You may see that I made a centre for one to them using a different colour, and that was made by just rolling up a thin small strip of pink lightweight card. It is best to use good quality paper for these items. The tree was cut out using a cottage cutz die, which was a present for me. It has heart shaped separate leaves, which I have not shown here. The thin leaves (one either side of the spellbinder ones) are also dies from a different company, of which I am not sure. The last two flowers (green and yellow flat ones) I cut out using my cricut expression.

I have many more dies and will do something with them another time. Just remember you can use off cuts from anything to make things with.
A hint on making flowers. If you have a heart punch, then punch out a few from the same or different bits of paper. Cut the hearts down the centre into two halves. Make the flat bit round so that they look like petals. You can then glue or stick them down with the pointy end to the centre and if you slightly curl the ends of each part, you will have a lovely flower. To cover the centre you can put a gemstone.
I could goon and on, but I thin that's enough for today.
I hope you are all well and have had a great weekend.
Love and hugs
Annie xxx
That's one loooooong post to make up for the three days lull! Really interesting showing all your die-cutting. I have folders of bits, which I too use for dies.
ReplyDeleteThanks Alice. It did go on a bit didn't it? Sorry about that!
DeleteThank you for popping in today.
Love and hugs
Annie xxx
Love the doily style dies, I think I need some of them.. I've just invested in the quilling dies from X cut ( a bargain!) as they make beautiful 3D flowers. Creativity club has a fab video.http://www.docrafts.com/project/Creativity-TV-Episode-51-Quilling/p3269133
ReplyDeleteHi there Ann,
ReplyDeleteI got my quilling dies from the Creativity Club, and they were a bargain!
Thank you for visiting me today.
Love and hugs
Annie xxx
Great post Annie. I'm glad I'm not the only one who refuses to throw away their offcuts :-) I also stamp on mine and have a tiny daisy punch to hand for the really little bits
ReplyDeleteThat's a good idea :) Thank you for visiting me today.
ReplyDeleteLove and hugs
Annie xxx
LOvely die cuts xx
ReplyDeleteThank you Fran, and thank you for taking time out to visit my blog too.
ReplyDeleteLove and hugs
Annie xxx